To the beat of the Drum

There have been stirrings among the MHWC, stirrings of a strong Napoleonic complex…
Here’s two of our members to talk about their new projects!

Für König und Vaterland!
Club Secretary Steve Thomas talks of his new Prussian Persuasion

This year at the MHWC, there had been considerable talk around the Napoleonic Wars. This was kickstarted by a lovely collection of 15mm Naps very kindly donated to the club last year. We’d made use of them a few times playing games of Black Powder under the watchful eye of Simon Warren - a true aficionado of Black Powder!

While I really enjoyed playing the games, I felt myself getting bitten by that ever so insidious bug and decided I needed some Naps of my own! However, between the 15mm collection and Simon’s own extensive 25mm Peninsular War collection I wasn’t sure how to start. It was during these days of contemplation that I found a rulebook stored in the MHWC’s vault - a copy of Sharp Practice by Too Fat Lardies. Leafing through got me interested, and after watching a few of the Lardie’s informative videos online I had decided that I had a new project. With the rules selected came the next challenge - what to collect? It turned out that our esteemed Chairman, Dave Mustill, already had a French force in 28mm. That sorted the scale and side I wanted to collect - but still didn’t answer what nation?
I started looking at different options, with the obvious solution being British troops. I must admit though, that there’s a certain dullness to the regimented Red and White to me. It was around this time of head racking that my other half (who has started to develop a budding interest into history and wargaming) asked about her countries involvement during the Napoleonic Wars. And thus, my journey into the Prussian history began!

DSC_0120.JPG

I decided almost straight away that I wanted to collect later Prussian troops, post reformation. I settled on a soft 1814-1815 style collection and was captivated by the Warlord Games Landwehr box. I loved the ramshackle look of the models, and the distinct lack of uniformity. The troops arrived in my possession and not a month had passed before I had put in an order with Foundry for some Landwehr Lancers and officer types to bulk my force out. I was in love with their designs, with the soft forage caps and the bulky coats. For a little bit of a difference I also decided to include a unit of Landwehr armed solely with pike (sans 1 musket armed figure), this was in relation to research I read which stated that a number of poorly funded Landwehr trained with pike until they could be issued muskets. I enjoyed painting them thoroughly.

DSC_0121.JPG
DSC_0124.JPG

But once I had finished, I felt that there was something missing. Alas, before I knew what had happened I had ordered a box of Prussian Line from Perry Miniatures.

DSC_0125.JPG

They look pretty good ranked up next to each other, even though the Perry’s are slightly thinner overall than their Foundry or Warlord counterparts. I think it’s the larger greatcoat design of the Landwehr that help to trick the eye into thinking they’re actually the same size figure. And now, after several months painting I’m quite proud of how they stand. The forces themselves are quite different.

My Landwehr are organised as if from two distinct groups. There are 2 units of 10 in Silesian colours, supported by a unit of Jaegers and 2 units of 10 from Westphalia supported by a unit of Lancers, musician and colour bearer. The Line are a little more regimented. 4 units of 8 Line with a unit of 8 Grenadiers and a 6 pounder gun. The gun, quite handily, also has a howitzer barrel so I can swap it out at will.

DSC_0127.JPG

I’m very pleased with my work on these fine figures, but there’s no fun only collection one side of a conflict is there?
Well, I may just have to get me some Saxons soon…


Rally to the Flag!
Oni’s thin Red Line

This month I started to focus on painting up some of my Peninsular Wars British troops. This is my first attempt for my own personal Napoleonic force for wargaming. I painted for another person from the club in the past. But these troops have become a focus for me. I plan to use them for a few games of Sharps Practice once I have painted enough. I undercoat them with a black acrylic paint. For the trousers I painted a few light layers of white paint. The red coats were painted with a flat red. This took two coats of paint. The flesh was done with a pale flesh paint with a wash of flesh wash. The black back packs were dry brushed

with a dark grey. The guns were painted a dark brown for the wooden parts and the metals were painted dark gun metal with a steel highlights. Once the paints and washes were dried I used PVA to stick flock onto the bases. The models are a mix of Warlords and Vitrixs ranges.

oni2.jpg
oni1.jpg

MHWC Vanguard - Rob, Week 1

Milton Hundred Kings of War Vanguard – Part 1 Initial Thoughts

When I heard my club, the Milton Hundred, was applying for a chance to trail Kings of War: Vanguard I thought this was a great opportunity and was one of the first to put my name down. Having dabbled in the word of miniature wargames since school I didn’t want to pass up the opportunity to get involved in something new and Vanguard seemed like it could be a game for me. My first experiences of wargames, like so many of us, was Warhammer 40K and fantasy approximately 17 years ago (around the time of the 3rd editions). This got me hooked in the hobby but I was frustrated by some of the changes when fantasy was replaced with Age of Sigmar which almost completely removed my own army of the Dwarves.

Having looked at the Mantic website a few different factions caught my eye but when I saw the Northern Alliance I was instantly drawn to the models. The diversity of unit types due the armies back story of them being band of outcasts suited the style I was looking for in this new kind of skirmish game. Ranging from snow trolls to humans, elves and even to my old favourites of dwarves. I have always wanted an excuse to add snow basing to my miniatures and this seemed a perfect opportunity to trail this different method of basing.

Luckily we were selected and the vast order arrived and was split between six of us in the club: Olly, Steve, Mark, Dave, Chris and myself; each of us taking a different faction and a share of the objectives to paint in our own styles. On collecting my share I was amazed to see the quantity of products awarded and the quality of the parts received including a full rulebook, a set of power dice (required for gameplay), half a box of objective markers for me to complete, a set of gameplay tokens, a Northern Alliance Warband box and a booster pack. It was an impressive starting hoard.

On a quick flick through the rulebook I like the approach they have taken in presenting the rules. Unlike many rulebooks currently on the market, Vanguard gets straight into the action with clear basic rules from the outset going into further detail as you progress. It is nice that there is not too much dense text to read before you get into the rules as lets be honest we all want to get down and play the game! There is a small amount of background listed as you progress deeper into the book so you can get a feel for your armies and the world in which they live which is especially important if like myself you are new to the Kings of War Universe.

On exploring the boxes further I got to the heart of the package the miniature themselves. As stated earlier there is a lot of variety with the Northern Alliance with a great diversity of miniatures. There was a mixture of plastic and resin parts of good quality. All the miniatures with fur or fur cloaks had great details which I was extremely pleased about and they look as if they will come out nicely when fully painted. There were a few little annoyances though. Firstly the very thick resign pieces on the feet of some of the larger miniatures – these took some persuasion to remove and it was difficult to cut close to the feet without damaging so meant a large amount of filing was needed. Secondly mould lines – some of these were in awkward positions near facial features which did make them hard to remove without potentially damaging the model. Finally the bases – there was a mixture of bases some plastic and some wood. Whilst this in itself isn’t a problem the fact they are different depths was annoying as the wooden ones are much thinner than the plastic. Also the plastic bases have holes in them to allow some of the older mantic models (such as dwarves) to be based seamlessly but newer models don’t have moulded bases which meant the bases had to either be filled or flipped upside-down. I opted for the later but the perfectionist in me still doesn’t like this as these is a slight different look to the bases although it is barely noticeable.

Overall on first glance Mantic seams to have done a great job on the look and feel of the basic rules. The models are of good quality, especially for the retail price, although not without their annoyances but this could be said for any model purchased on the market currently. In my next piece I will be giving my thoughts into painting these models.

Rob Cooper

MHWC Vanguard - Chris, Week 1

Prologue: Hi Guys a quick intro on what’s going on. Mantic put out an invite to clubs all over the world to learn about their Vanguard skirmish game. Our club Milton Hundred Wargames Club were one of the lucky ones to be picked.

We’re a club based in Sittingbourne, UK. Don’t worry if you’ve never heard of Sittingbourne it’s a teeny tiny town about 30 miles south of London. But we do have an awesome club and we run a games show each year so it’s a good place to live.

We were sent 6 sets of their rules and enough minis to build a warband each.

Over the next few months we are going to post about our experiences, what we like and how we all get on. Some of the guys will be doing videos and others have their own blogs where they’ll write amazingly in-depth reviews of everything. My web skills are quite limited so I’m going to keep mine short and sweet; 500 words a week.

Hope you enjoy our journey.

Week 1: Olly got the miniatures and we all got super excited. He originally said we’d have to wait until the next club night to share them out. Needless to say none of us could wait that long to get our hands on the new shiny.

So we met at the pub and dished out the goodies. I had chosen to go for the Abyssals. I originally saw these minis come up on Kickstarter back in 2017. I’d been sorely tempted then but none of my friends had been playing Kings of War so I couldn’t justify it. I loved the classic demonic look of the Lesser Abyssals and Gargoyles. I’m not really up on the Vanguard setting yet but in my mind’s eye my troops are popping through small tears in reality and raining fiery terror down on their enemies.

64379373_2570418442992384_7622237537762803712_o.jpg

I went home and tore open the boxes and started poring through all the minis. Overall they are very nice. The detail on the resin minis is very crisp and the plastic ones have a ton of options.

First word of warning – there are no assembly instructions in the box. Not too big a problem because they generally only go together one way. There were various small bits that took me a while to work out where they went. My advice; spread them all out on the dining room table and attempt to dry fit them all before gluing.

With all the bits identified I started to clean them up. It took a while - there was quite a lot of flashing on some of the minis. Take your time and make sure you have a good knife. Once they were clean though they went together really well. I did not have any big holes or areas I thought would need filling.

I used both plastic glue and super glue to put everything together. Although the boxes say the minis are plastic it’s a weird kind of plastic that doesn’t bond with regular poly cement.

After a full weekend of cleaning the minis were ready to be undercoated.

And that’s the end of week one. See you all again next week.

Chris

The Team Yankee Project

Selecting and painting the U.S. Army, Part 1
by David Mustill (Club Chairman)

After much discussion we recently decided to take the plunge into Battlefront's 1980's Cold-War-Gone-Hot miniatures game, "Team Yankee". Based on the novel by HW Coyle and armed with its own alternative history timeline, TY takes the best war machines of the 80's and pits them against each other in a fictional war for Europe. With an ever expanding range of models encompassing more and more Nations and theatres of war, there is a scenario for every occasion!


First choice was models. We debated using 10mm or smaller tanks for a truly epic game size, but the available selection just wasn't large enough to keep up with the rules set. So we decided to stick with the Battlefront standard 15mm, as there are plenty of kits to utilise, and the official TY kits come with handy game cards. Next was choosing sides. Handily my opponent expressed an interest in Soviet armour and manpower, leaving me with my first choice, the good ol' U.S. of A! Being a child of the 80's I remember seeing news reports and having computer games involving the M1A1 Abrams tank and the A10 "Warthog" ("Thunderbolt"?) warplane, and being in awe of these modern monsters! Getting to wield them once again in battles is what swung it for me. Now if BF want to come up with Blackbird and B2 Stealth Bomber models, I would be in my element!

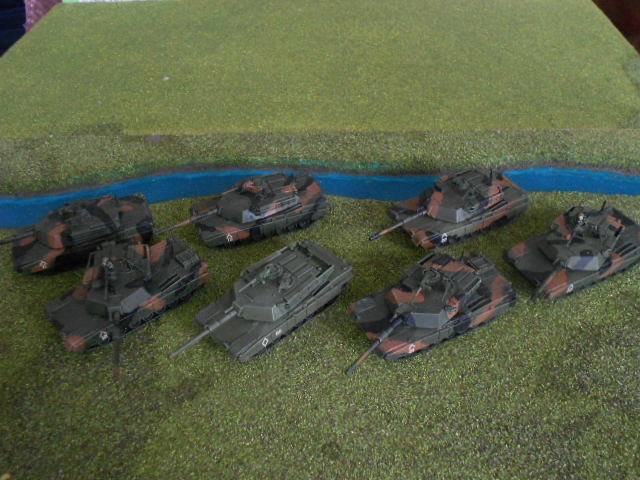
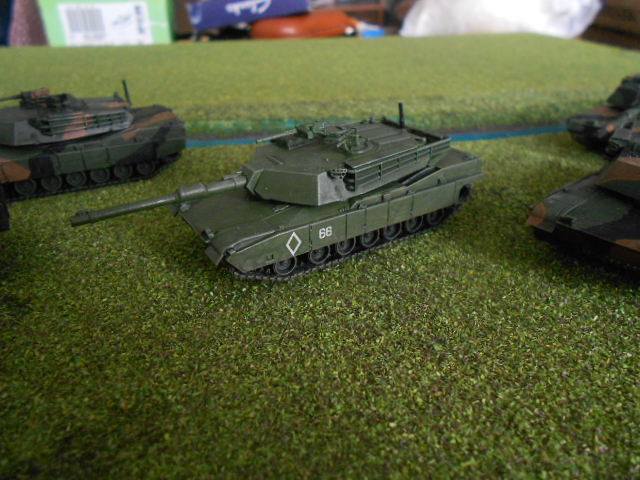
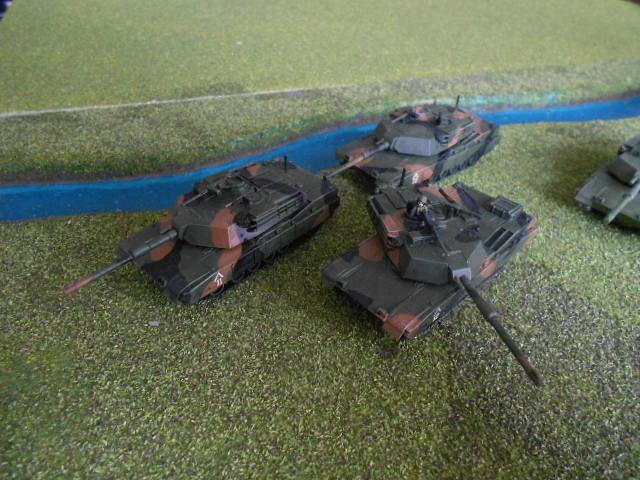
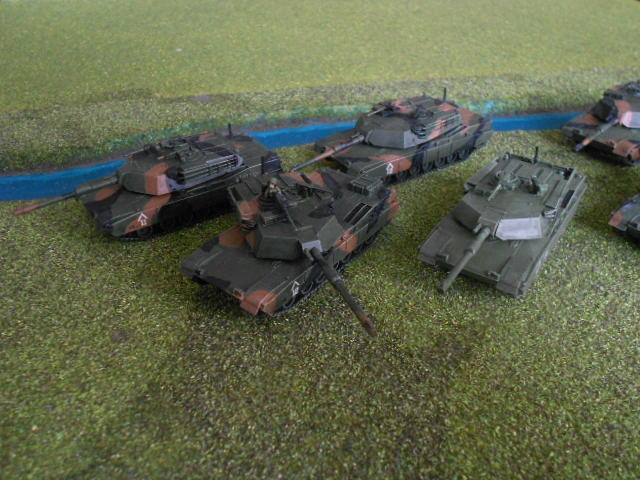
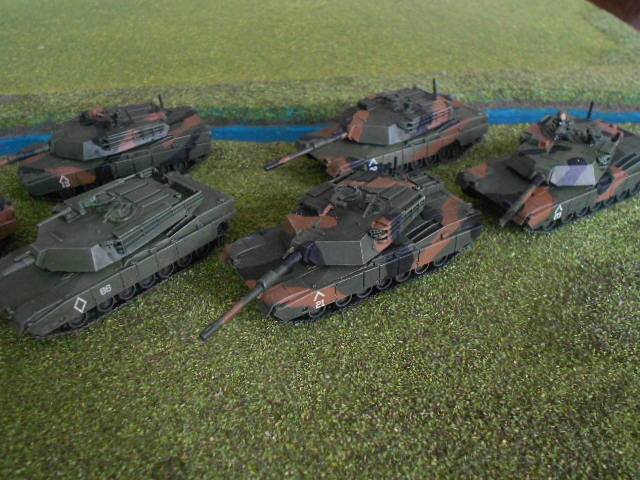
We managed to get hold of the "Hammerfall" starter set which pits T-64's against M1A1's in a two-on-two tester scenario, and comes with the requisite kits. We never got round to playing this particular game, but the models were perfect to get building and painting with, and the Abrams' became my command HQ section. Not overly fussy, the kits go together easily and look the part when finished! I decided that my Section leaders should have the IPM1 variant upgrade for a little extra protection, and to paint them a basic U.S. army green for that fresh-off-the-production-line feel. So far so good. Before our first game I acquired some M113's and U.S. Marines second hand from a Vietnam range for re-purposing, but I wanted to go tank heavy and so picked up a box of 5 Abrams. I hit them with a camouflage paint job I found in a picture online, starting with the turrets facing the rear and the U.S. army green all over, followed by random sprawls of matt black and a Coat D'Arms "Hairy Brown" which seemed to do the trick. Drybrushed highlights and a coat of Army Painter "Military Shader" wash all over had my first two platoons ready for the battlefield!


After our first test game I decided to tweak my line-up slightly. One of the two-tank HQ team was demoted to a regular platoon member to give me two even platoons of three and a single command tank. It felt like the best way to go forward with the units as I could now top up as I go, making platoons up to the full complement of four, adding extra platoons, or re-installing the second HQ vehicle. Fortunately I had left off the identification markings decals so a small reshuffle ensued, with camo added to the extra tank, and both platoons and HQ unit designated ready for battle. First and Second Platoons ready for action!


David Mustill